Mastering Image Upscaling in Photoshop 2024: A Step-by-Step Guide
Unlock the power of Photoshop 2024 with our comprehensive tutorial on using the AI upscaler to enhance your images! In this video, we explore Adobe's groundbreaking "Preserve Detail 2.0" feature, designed to tackle the challenges of image upscaling while preserving intricate details and overall quality. Whether you're a designer, photographer, or digital artist, this easy-to-follow guide will help you elevate your graphics to new heights without sacrificing clarity.
Introduction to Image Upscaling
In the ever-evolving world of digital graphics, maintaining image quality during upscaling has posed a significant challenge for designers and photographers alike. With the release of Photoshop 2024, Adobe introduces an innovative solution to this age-old problem. In my latest tutorial, I delve into the process of enhancing image resolution without compromising on detail, using Photoshop 2024’s advanced "Preserve Detail 2.0" upscale feature. This is an easy tutorial, so let’s dive straight in.
Getting Started with Image Upscaling
Before we begin the upscaling process, it's imperative to activate "Preserve Detail 2.0."
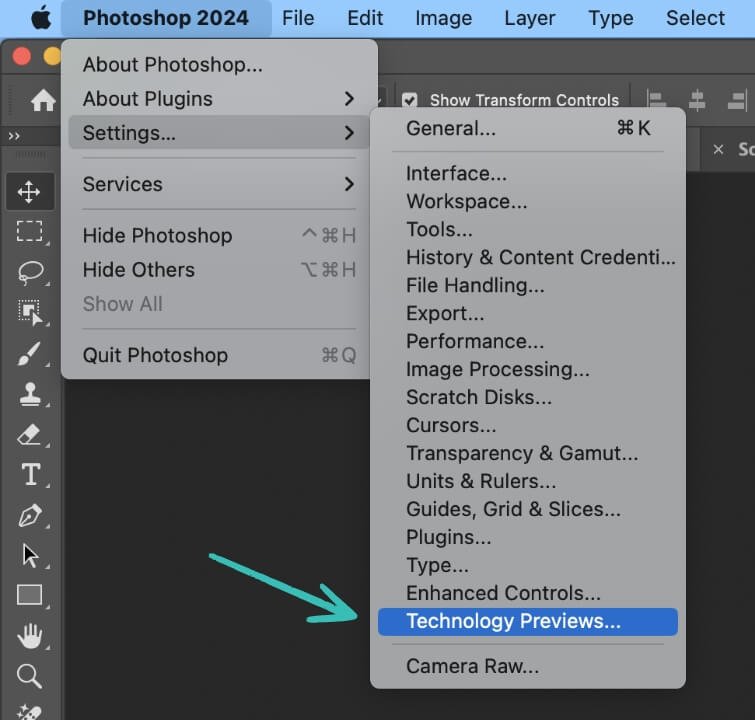
Navigate to the top left, select “Photoshop 2024,” proceed to “Settings,” and then click on “Technology Previews.” A dialogue box will appear where you must ensure that “Enable Preserve Details 2.0 Upscaling” is checked.
This step is vital as it leverages sophisticated algorithms to significantly boost image resolution while carefully maintaining the quality and intricacy of the details, resulting in an upscaled image that looks strikingly natural and free from pixelation.

The Upscaling Process
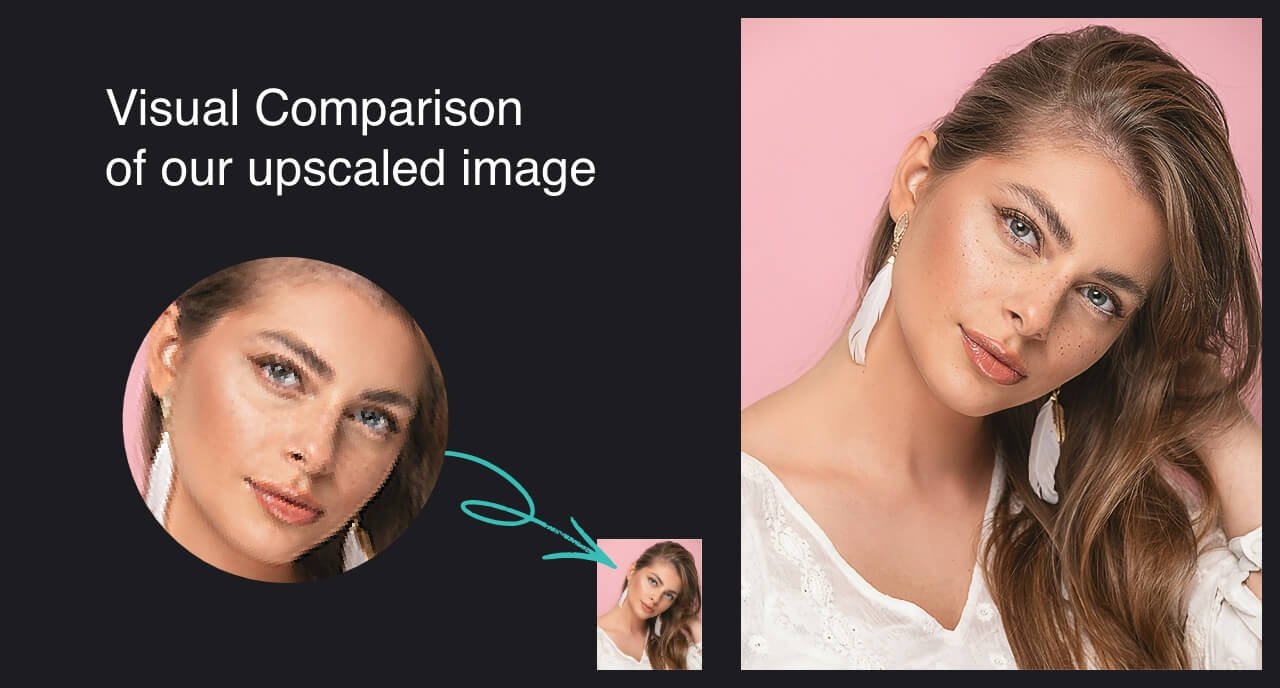
To help guide you through this process, I am going to use a real example. My goal is to enhance this rather small image, from a mere 500 pixels in width to an ambitious 2,500 pixels - that’s a 5x increase in size!

Adjusting Image Size
To increase the size of our image, we are going to do this using the “Image Size” functionality in Photoshop. To find this, head up to “Image” and then “Image Size”. A box will pop up that looks like this.
Before we upscale, make sure that you have “Preserve Details 2.0” selected, instead of “Automatic”. You also need to change the measurement so that it says “Pixels”. After that, you will be ready to increase the size of your image.
After this, you can input your desired size. I’m upscaling my image to 2,500 pixels.

The last thing to consider here, and this will be relative to your image, is the “Reduce Noise” slider. Have a play around with this, I personally prefer something that’s around 20%, but tweak this to your liking and then hit “OK”.
Congratulations, you have increased the size of your image in the most non-destructive way possible within Photoshop - well done you!
Enhancing Image Quality with High Pass Filter
If you would like to take this one step further, there is one more step that will increase the sharpness of your image.
To do this, we are going to use a “High Pass Filter” - sounds complex, but this is a standard practice within Photoshop when it comes to increasing the sharpness of an image. It works by isolating and highlighting the edges and fine details within an image.
Before we use the High Pass filter, we first need to make a copy of our layer using the shortcut Command or Control J.

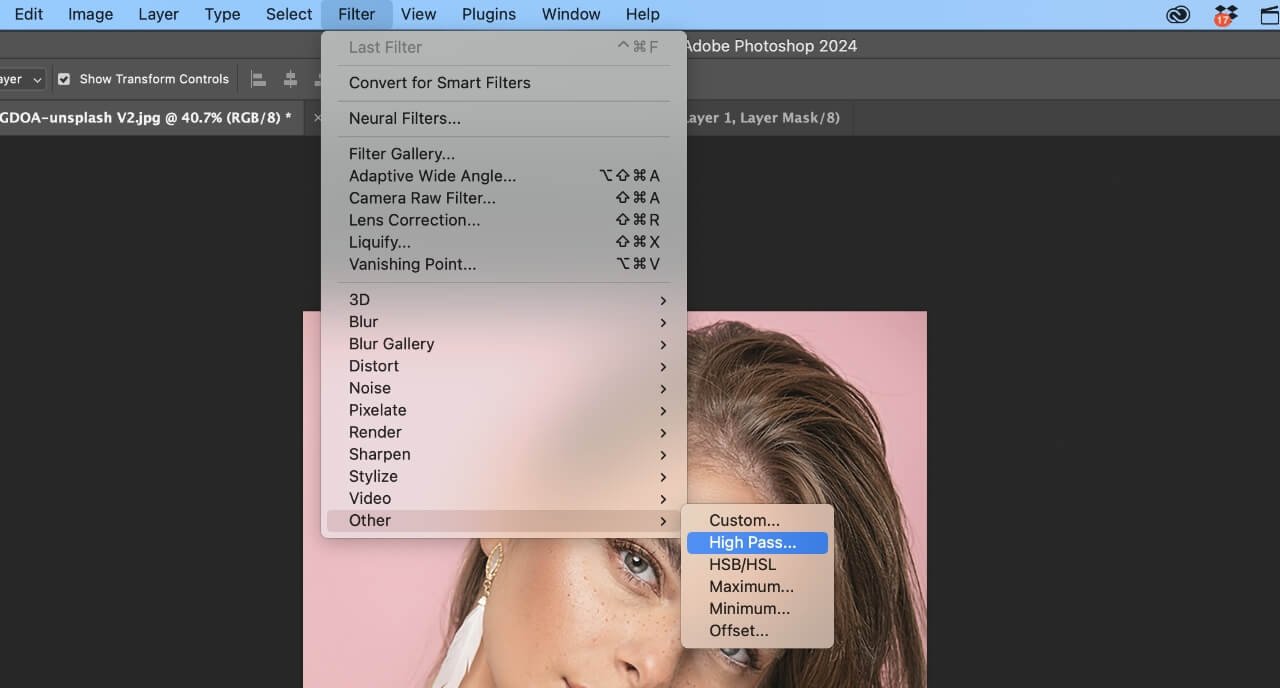
Then, with this layer selected, head up to “Filter”, and “Other” and then select “High Pass”.
Applying the High Pass Filter
When you apply a high pass filter, Photoshop generates a grayscale version of your photo, where the flat areas become neutral grey and the edges are accentuated. By adjusting the radius setting, you can control the extent of the sharpening effect: a smaller radius sharpens finer details, while a larger radius enhances the more significant edges - so play around with this to your liking.

After applying the filter, you blend this layer with the original image using blending modes like Overlay or Soft Light, which allows the sharpened edges to enhance the overall image sharpness without affecting the image's colour or brightness.

This method is especially favoured for its precision and the ability to achieve a more natural-looking sharpness compared to other sharpening tools.
Conclusion
Congratulations, you've now upscaled your image and increased its sharpness, all while preserving its original quality. Photoshop 2024 makes this process straightforward and effective, ensuring that your upscaled images look as natural and detailed as possible. Feel free to reach out if you have any questions or need further assistance.