How to Change the Colour of Clothes in Photoshop 2024: Easy Tutorial
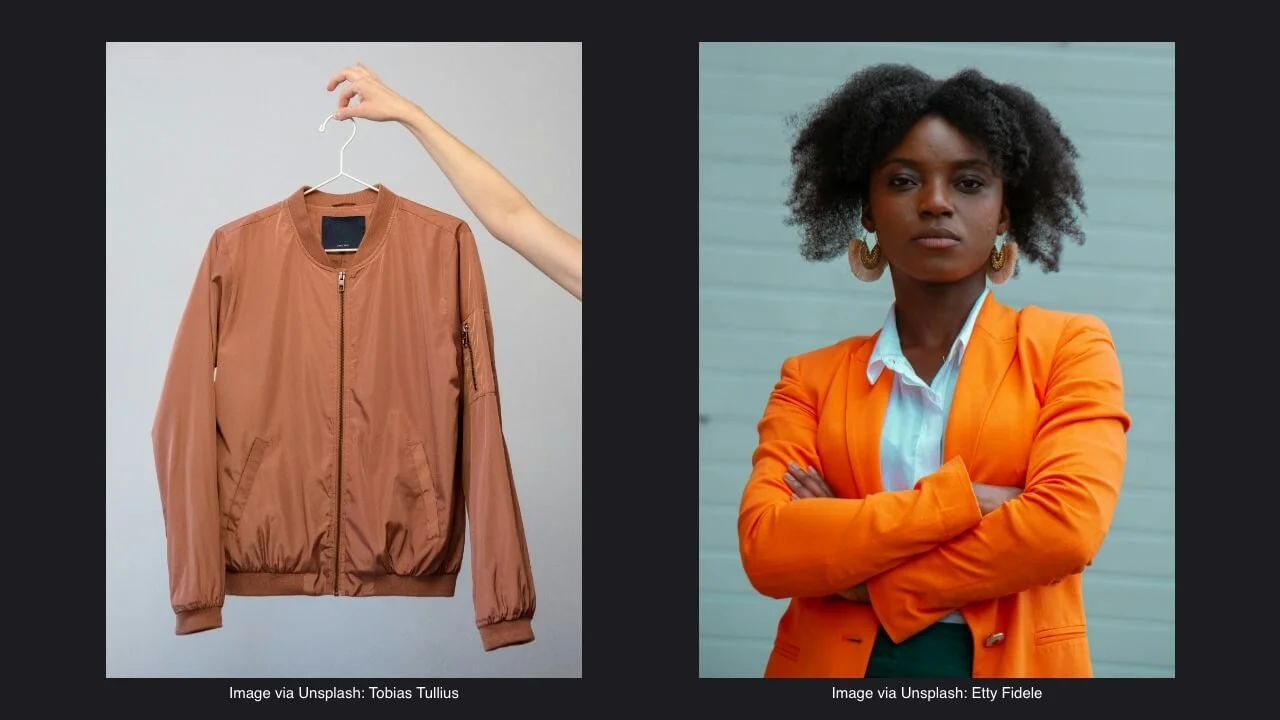
Hello, fellow creatives! Ever captured a photo and thought, "It would be perfect if only the jacket were a different colour"? Whether it's for updating your product catalogue, elevating your fashion photography, or simply letting your creativity flow, altering the colour of clothing in Photoshop 2024 can revolutionise your images. I'm excited to share my approach to modifying clothing colours today, using two distinct scenarios: a standalone jacket and a jacket worn by a model.
I've chosen these examples because changing the colour of an item nobody is wearing is relatively straightforward. However, the task becomes slightly more complex with a model, due to the need to isolate layers and address issues like fringing or colour correction.
Part 1: Changing the Colour of a Standalone Jacket
We'll begin with the fundamentals by adjusting the colour of a jacket on its own.
Step 1: Open Your Image
Firstly, open your jacket image in Photoshop. Head to File > Open, and select your image.
Step 2: Select the Jacket
To make a selection, we are going to use the Object Selection Tool from the toolbar to encircle the jacket. The AI in Photoshop 2024 excels here, though, for finer edge adjustments, the Quick Selection Tool or the Lasso Tool might be more suitable.
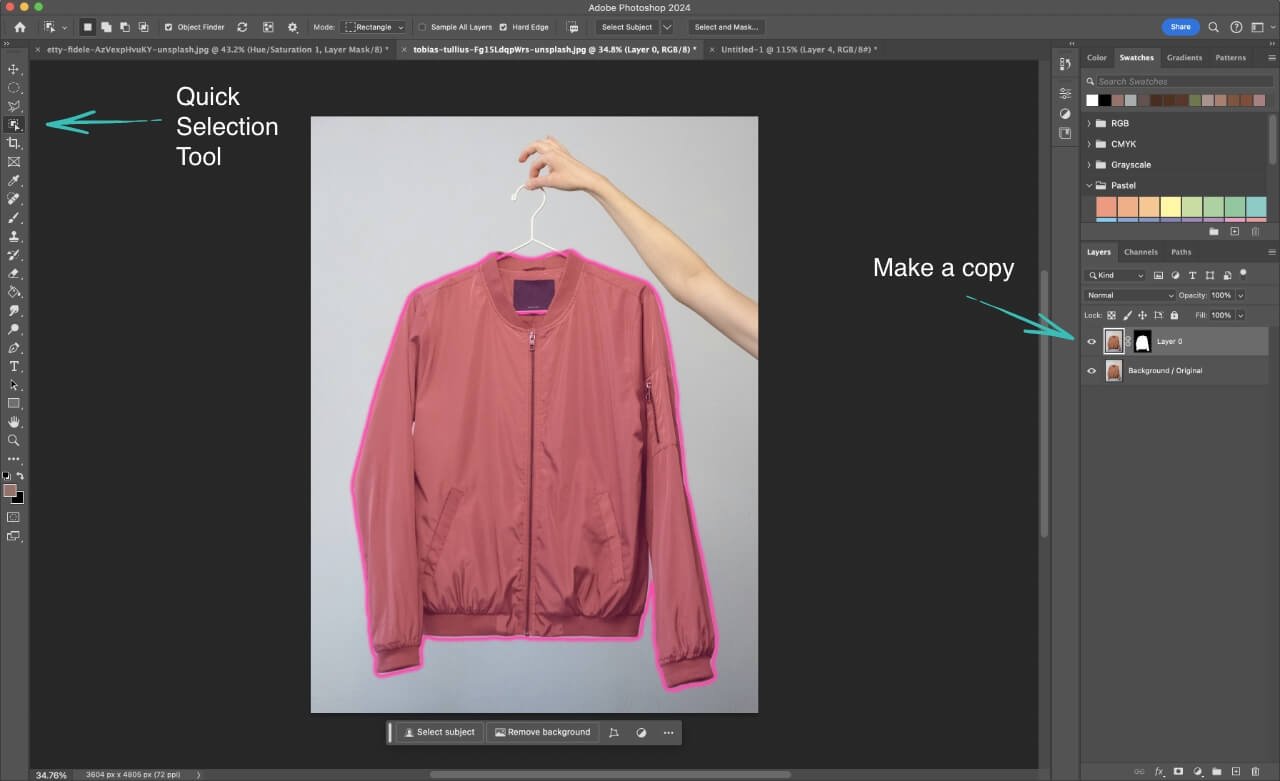
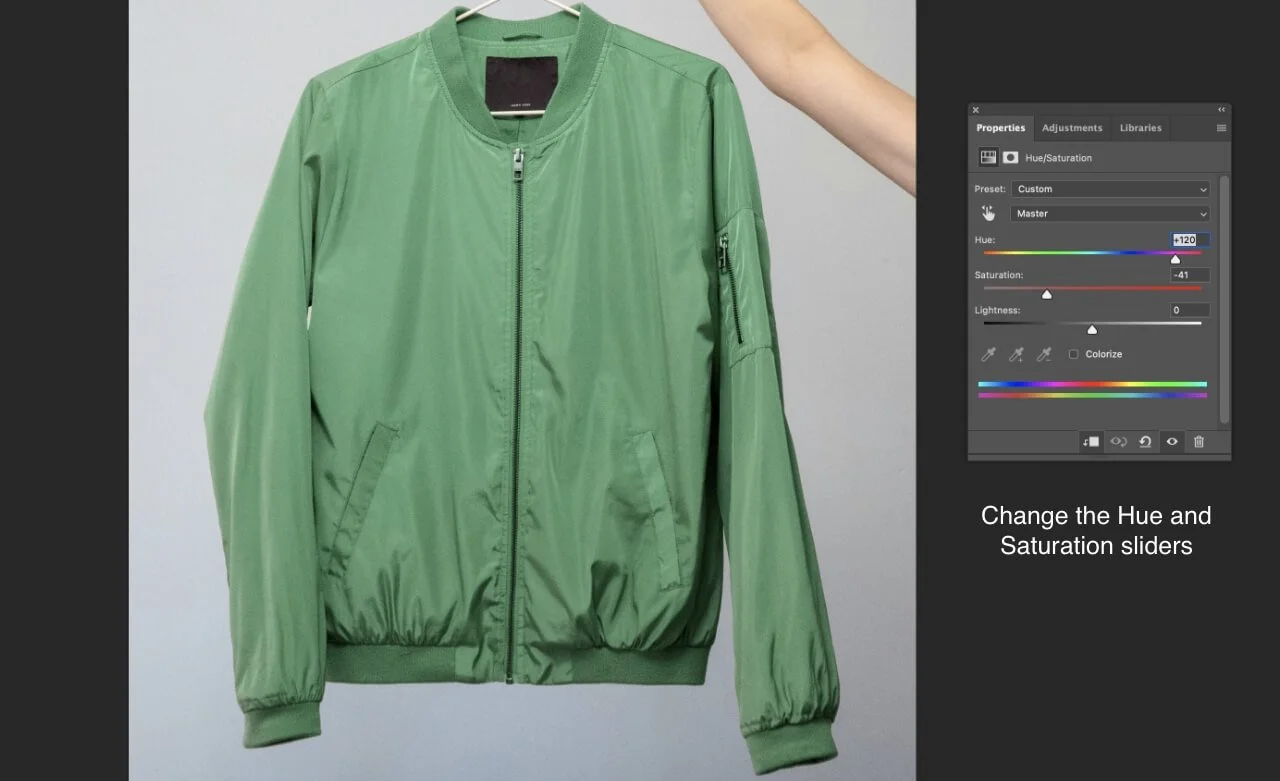
Step 3: Add a Hue/Saturation Adjustment Layer
With your selection active, hit the Create new adjustment layer icon at the Layers panel's bottom and opt for Hue/Saturation. This layer will automatically mask your selection, allowing you to alter only the jacket's colour. Convert this layer into a clipping mask to ensure only the jacket's colour is altered.
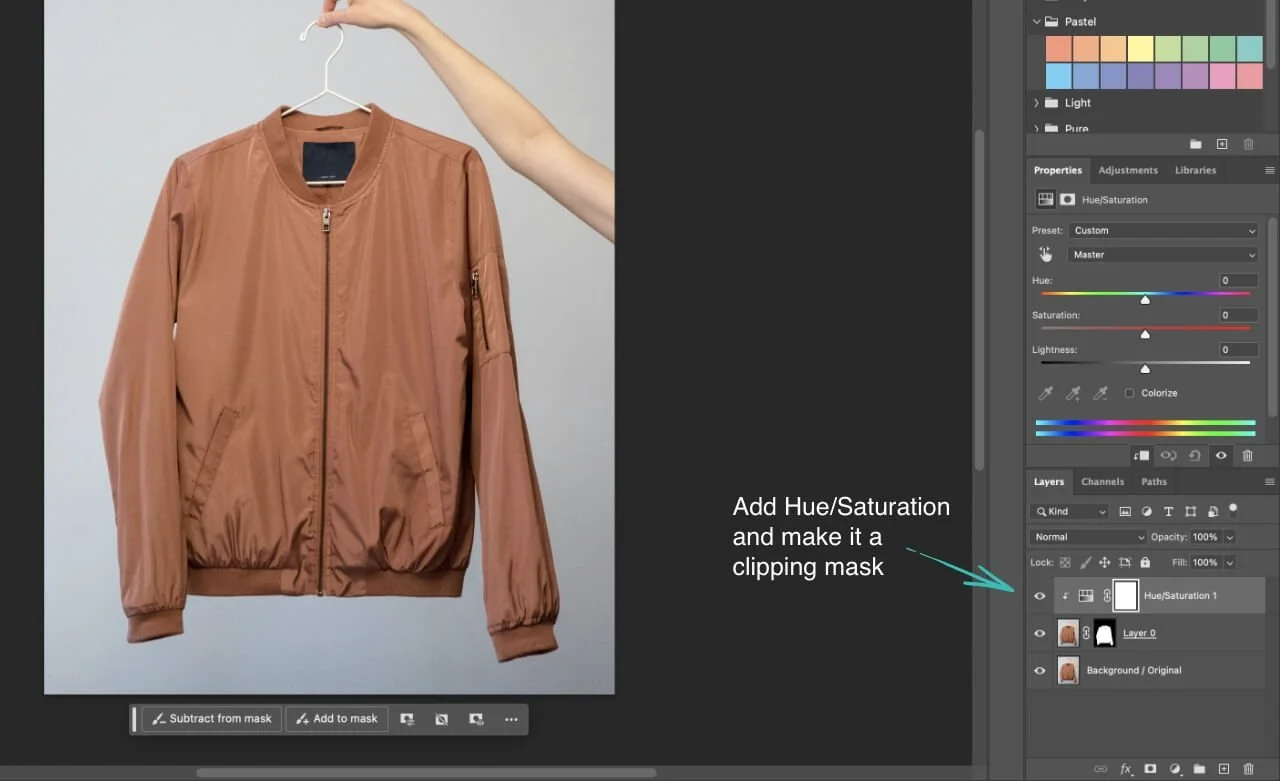
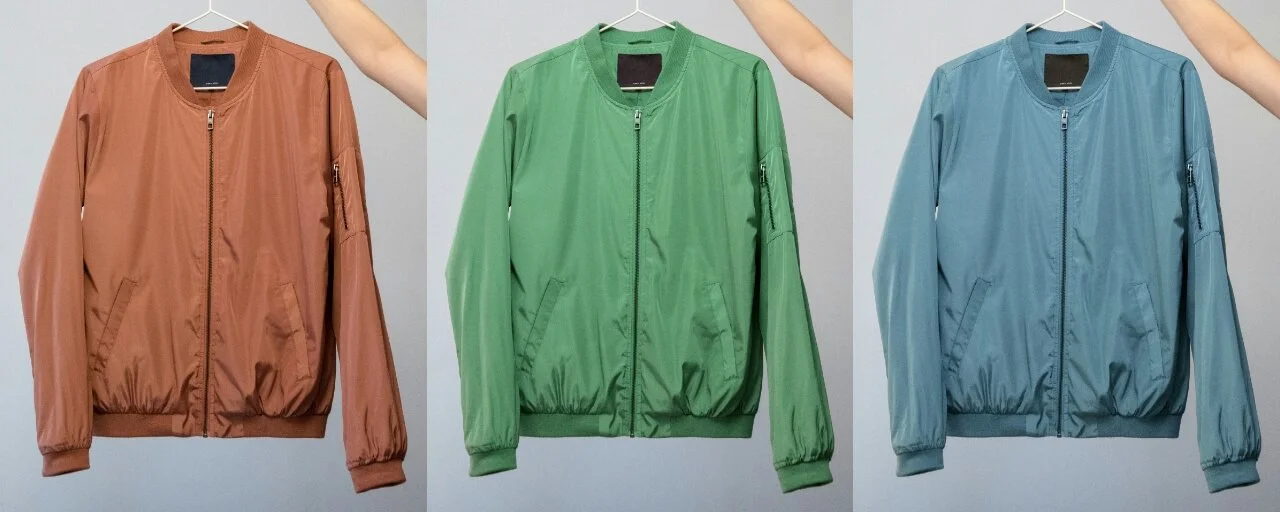
Step 4: Change the Colour
Navigate to the Hue/Saturation properties and tweak the Hue slider to modify the jacket's colour. Saturation and Lightness sliders are also at your disposal for fine-tuning the perfect shade.
For those aiming for a specific colour, although I'm not using it in this instance to preserve the zip and label colours, the Colourise option can be a handy tool.
Step 5: Refine the Edges
Occasionally, the colour alteration may exceed its intended boundaries or miss areas. To correct this, utilise the layer mask on the Hue/Saturation layer. With the Brush Tool (B), painting in black can remove undesired colour spills, while white can recover any overlooked sections.
Part 2: Changing the Colour of a Jacket on a Model
Adjusting the colour of attire on a model presents additional challenges, such as shadows, folds, and textures. Here’s my method to manage these intricacies.
Step 1: Open Your Image
Upload the photo of the model donning the jacket into Photoshop.
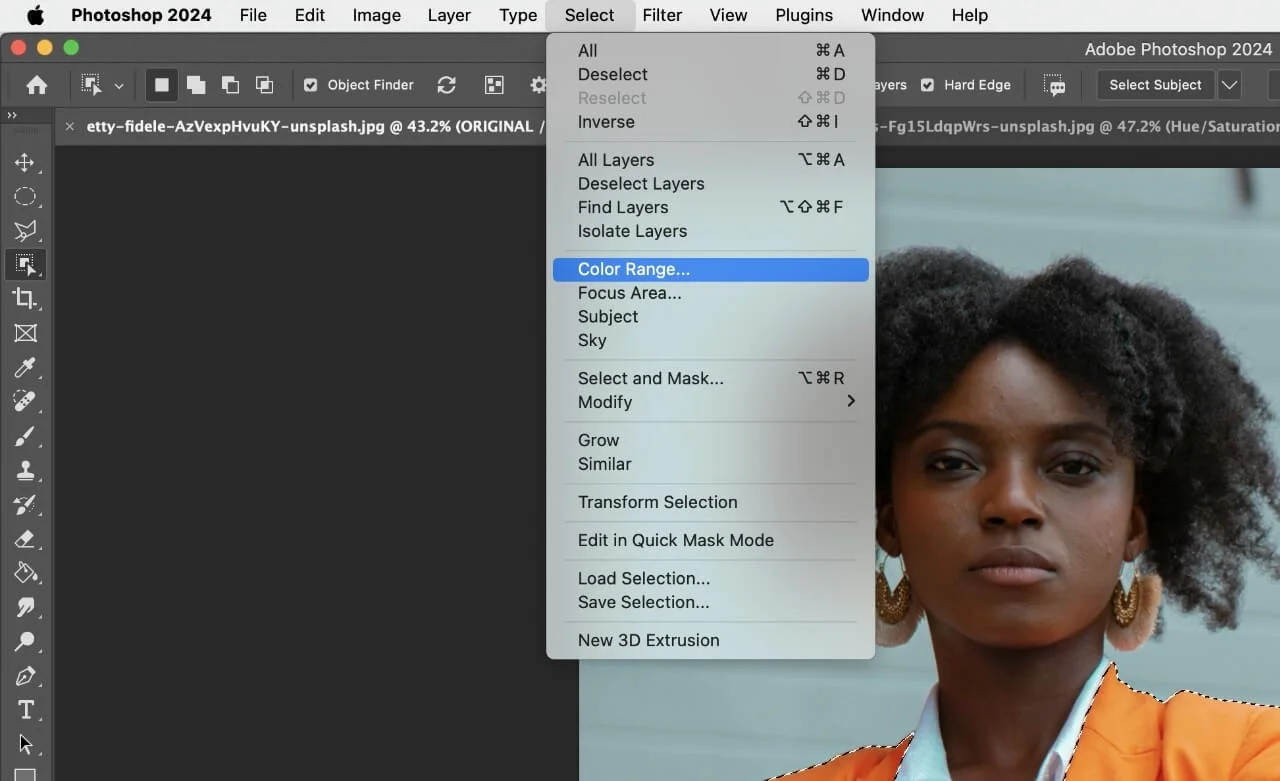
Step 2: Make Your Selections
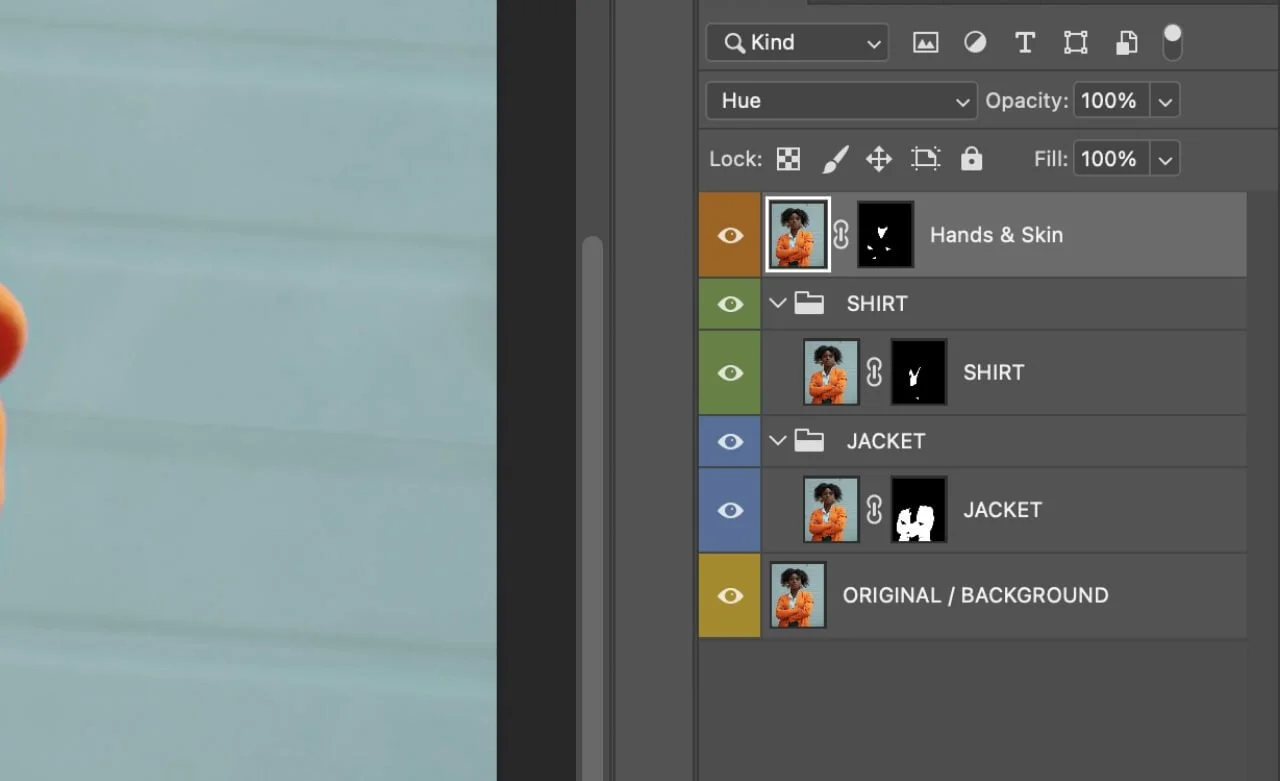
In this scenario, three selections are necessary: the jacket, the shirt, and the model's hands and neck. This segmentation allows for seamless colour changes to the jacket without inadvertently altering the skin or shirt tones. Precision is paramount here for maintaining a natural appearance.
To select the jacket, we are going to use the colour selection tool. Go to “Select” and then “Colour Range”. From there a box will open up. Underneath the “Save” button, there are three small boxes. Select the one with a “+”. This will make sure we are selecting only the colours of the jacket. Then drag your mouse over the colours you want to be selected. If you accidentally select something that you didn’t mean to, you can change the eyedrop tool using the “-” and “+”.
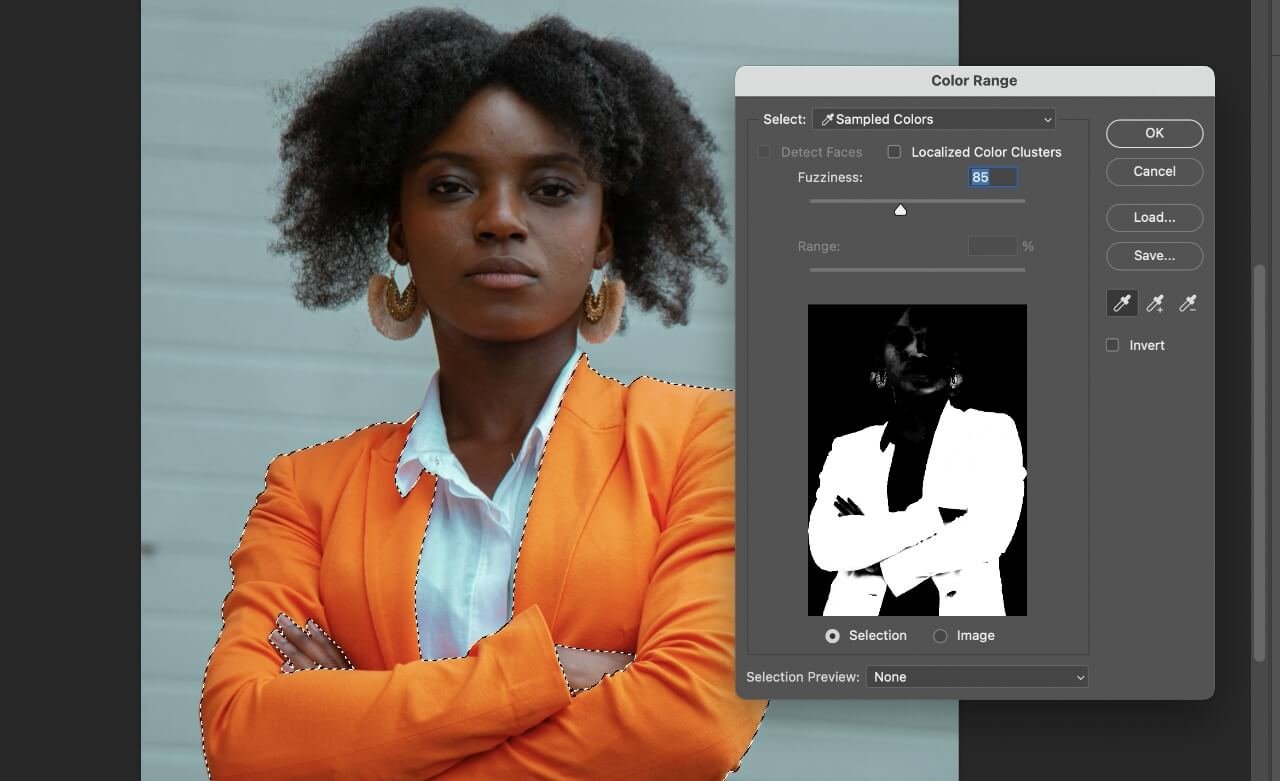
You might find that this captures other colours, such as skin tones. That’s no problem, make your selection and then use the Lasso tool to refine your selection. When everything is looking good, create a layer mask.
Next, do the same and make a selection with just the skin and then the shirt. Move both of these layers above our jacket layer. This will make sure that when we change the hue, we don’t alter the skin tones or shirt. For this example, I also took the shirt saturation down to zero.
Step 3: Organise the Layers
I recommend grouping the jacket and the shirt into folders, using Cmd+G (Mac) or Ctrl+G (Windows) as shortcuts. Arrange the skin group atop, followed by the shirt in the middle, and the jacket at the bottom.
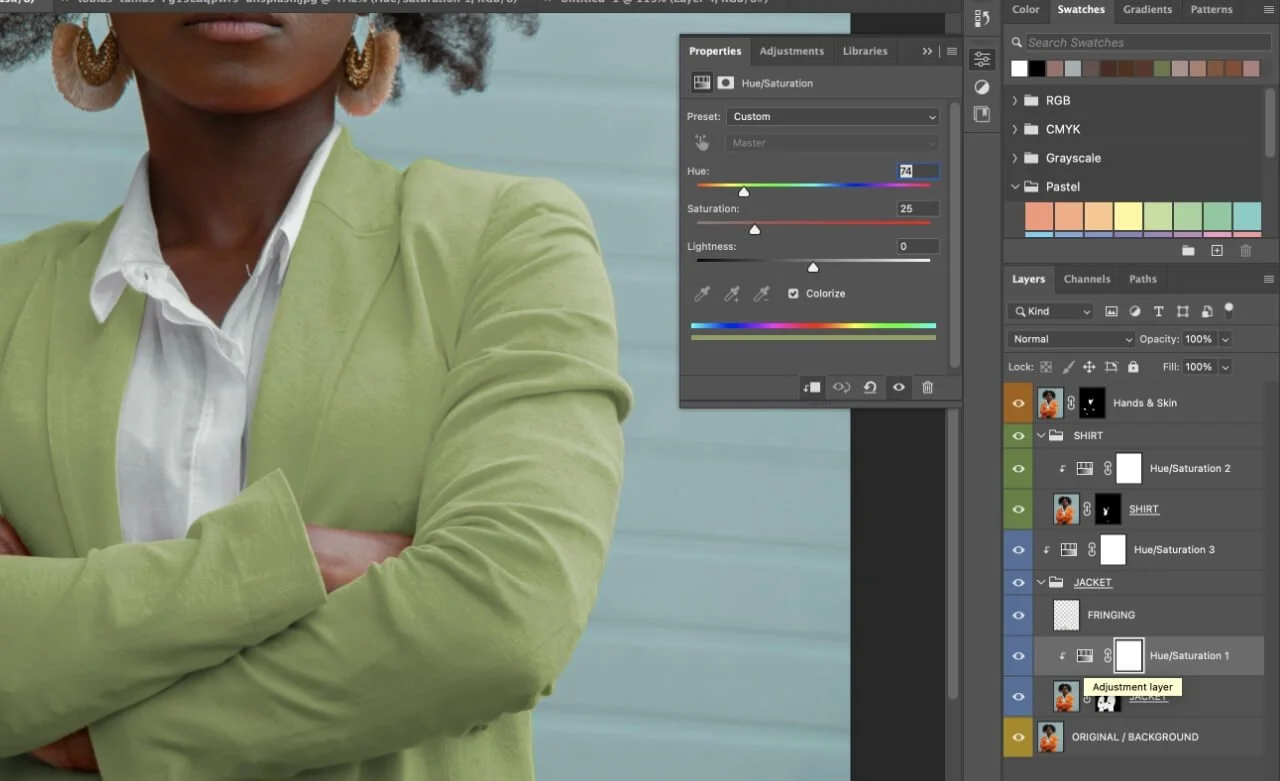
Step 4: Colour Change
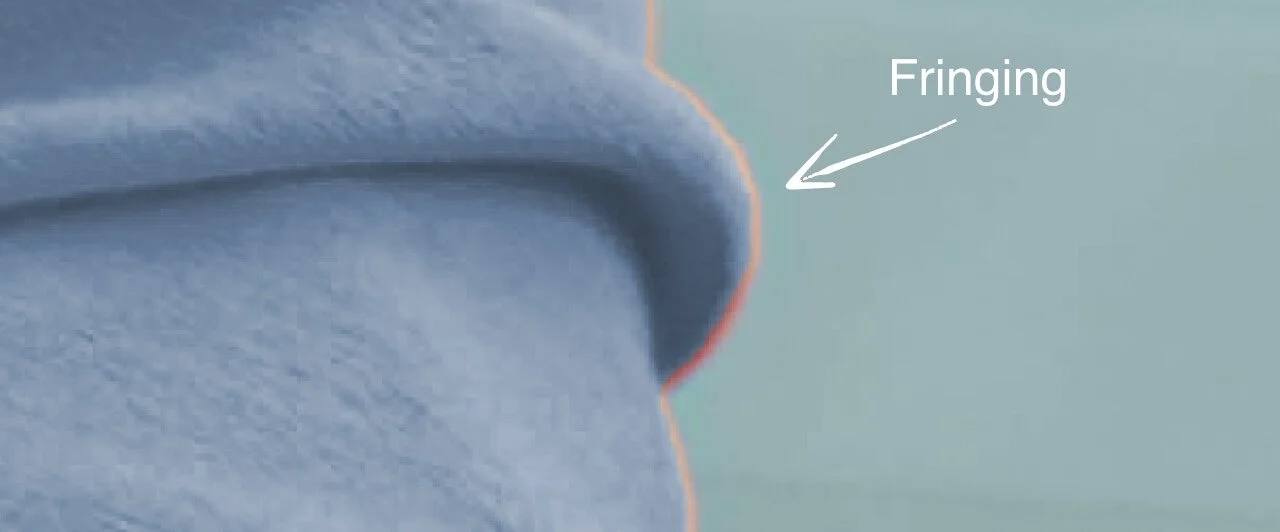
Add a hue saturation layer above the jacket and transform it into a clipping mask. Right-click the layer, select “Create Clipping Mask”, and adjust the hue to change the colour. You might notice colour bleeding, particularly around edges, known as ‘fringing’. In the saturation layer above the jacket, make sure you have “Colourize” checked and then simply change the Hue and Saturation to your liking.
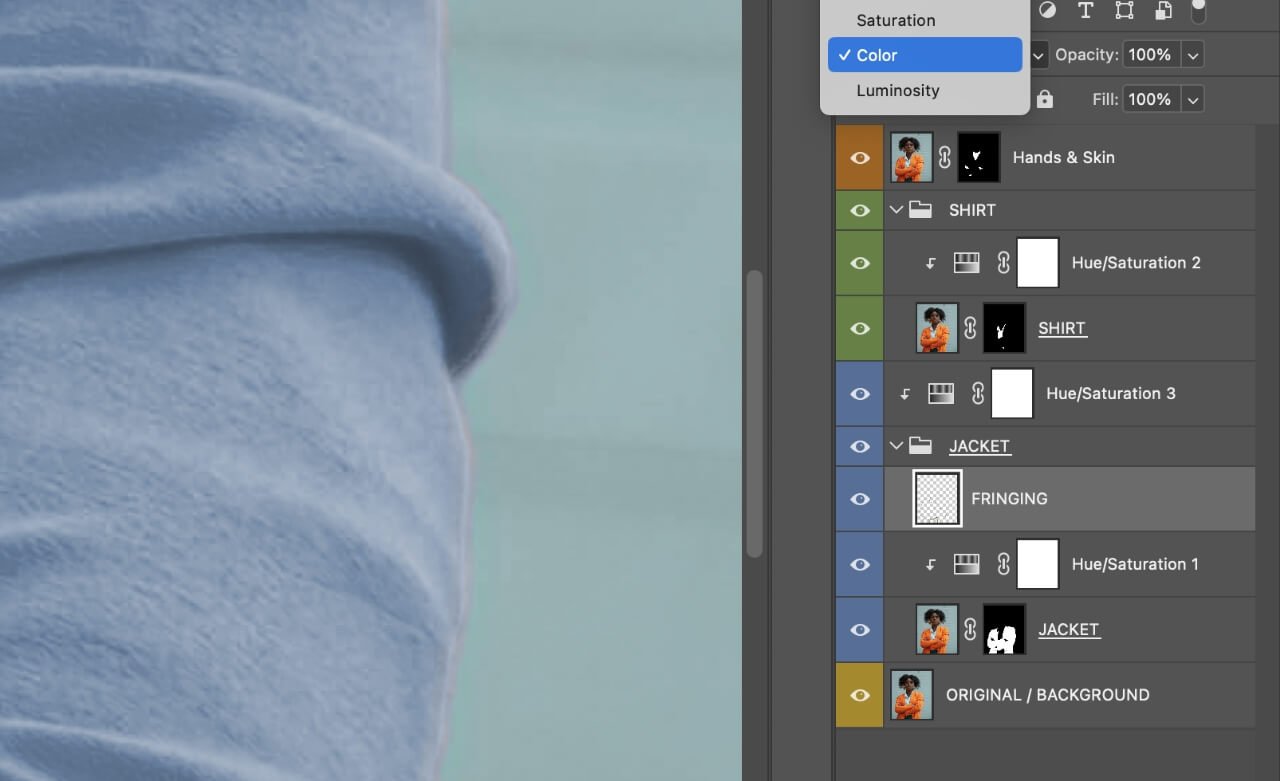
Step 5: Remove Fringing and Fine-tuning
To eliminate fringing, add a new blank layer above the hue saturation and set its blend mode to “Colour”. With the brush tool, sample a colour near the edge (using option or alt) and paint around the fringes until the original hue is completely masked. Patience is key here for achieving the best look.
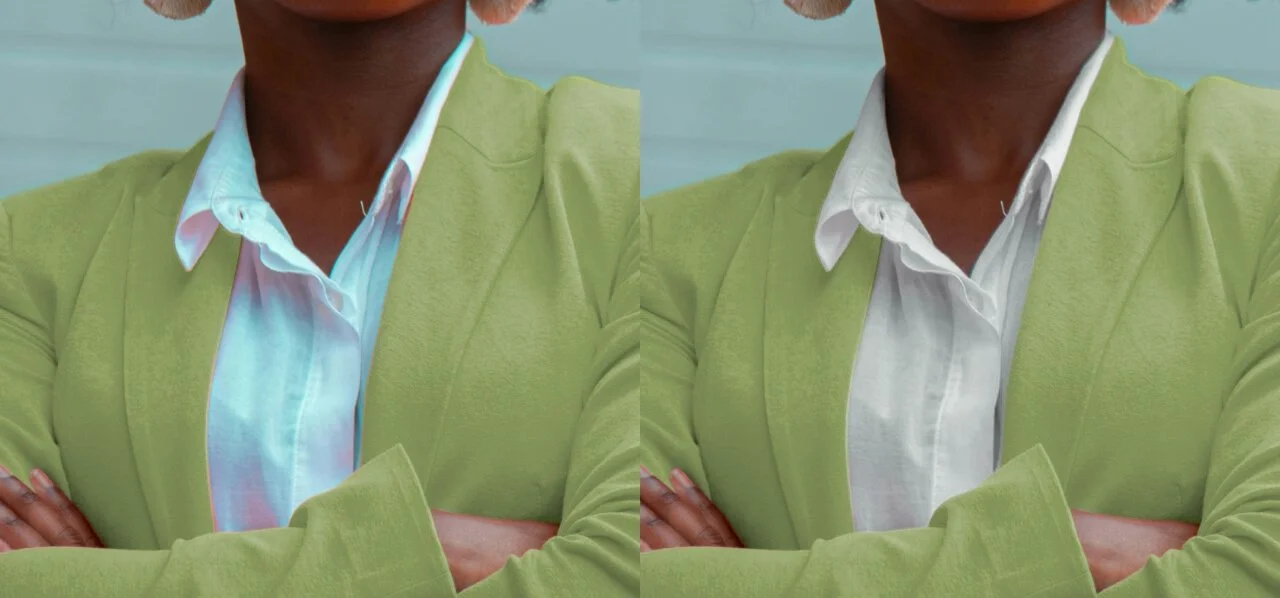
Step 6: Fixing the Shirt
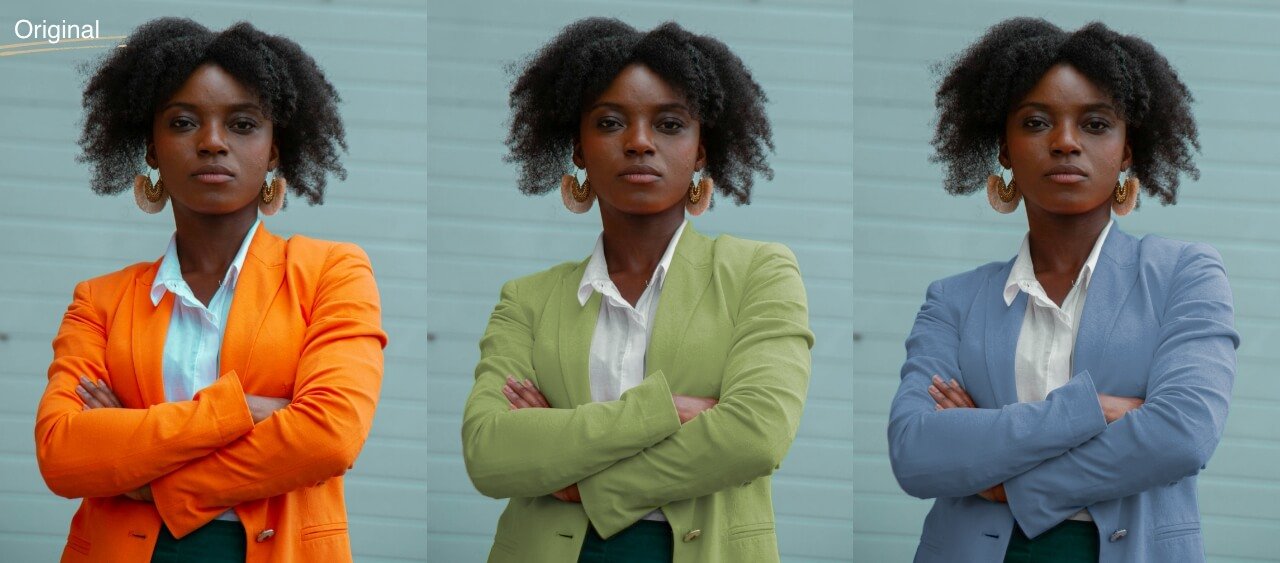
Given the original image's filter effect, the shirt might clash with our colour adjustments. To reconcile this, add a saturation layer above the shirt selection and dial down the saturation to zero. This correction won't affect the shirt colour due to the layer's position. Here’s a before and after.
Conclusion
Photoshop's capability to change clothing colours unlocks vast creative potential, enabling you to tailor your photos to various scenarios. These techniques promise professional, compelling results, whether for product photography or fashion editorials.
Keep an eye out for my forthcoming video tutorial for a deeper dive into these steps, complete with visual aids to master the art of colour transformation in Photoshop 2024. Happy editing!